

iPod Classic Charging Port Repair | Step By Step | iPod Repair Hamilton New Zealand AppleFix


Description
iPod classic 5th, 6th, 7th broken charging port involves micro soldering techniques. Watch Full video for how to replace ipod classic broken charging port
ipod classic Repair experts in Hamilton New Zealand Call 078394188 or visit Applefix & Tech Engineers 937 victoria street Hamilton New Zealand if you dont live in Hamilton you can courier your device read instructions here https://applefix.co.nz/send-your-device/
Below is a general guide to replace ipod charging port
Replacing the charging port (dock connector) on an iPod Classic (such as the 5th, 6th, or 7th generation) is a moderately difficult repair. The dock connector is soldered to the logic board, so you'll need some soldering skills or may need to replace the entire logic board if you're not comfortable with micro-soldering.
Tools & Parts Needed:
Replacement 30-pin dock connector (compatible with your iPod model)
Small Phillips screwdriver (#00 or #000)
Plastic opening tools (spudger or guitar pick)
Soldering iron & solder (fine tip, lead-free recommended)
Desoldering wick or solder sucker (to remove old solder)
Tweezers (for handling small components)
Heat gun or hot air station (optional, for loosening adhesive)
Kapton tape (to protect nearby components)
Step-by-Step Guide:
1. Open the iPod Classic
Use a metal pry tool to carefully separate the front panel from the metal back case.
Start at the seam near the headphone jack and work your way around.
Be gentle—the clips are fragile, and the display cable is underneath.
2. Disconnect the Battery
Locate the battery connector on the logic board.
Use a spudger to gently lift the connector to avoid short circuits.
3. Remove the Hard Drive (if applicable)
If you have a 5th/6th/7th Gen iPod, unscrew the hard drive and disconnect its ribbon cable.
4. Access the Logic Board
Remove any remaining screws holding the logic board.
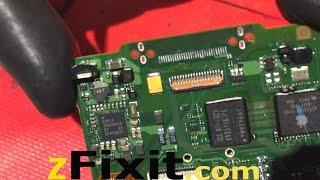
Carefully lift the board to access the soldered dock connector.
5. Desolder the Old Dock Connector
Apply flux to the solder joints for easier removal.
Use a soldering iron (300–350°C) and desoldering wick to remove solder from each pin.
If using a hot air station, heat the connector evenly (~250°C) and gently lift it once the solder melts.
6. Install the New Dock Connector
Align the new dock connector properly.
Solder each pin carefully, avoiding solder bridges.
Check for continuity with a multimeter if possible.
7. Reassemble the iPod
Reconnect the hard drive (if removed).
Reattach the battery connector.
Carefully snap the front and back case together.
8. Test the iPod
Plug in a charger or sync cable to verify the new port works.
Check for audio playback and button functionality.
If it sound difficult bring it to www.applefix.co.nz



















Comments